![<?echo $_SERVER['SERVER_NAME'];?>](/template/twentyseventeen/skin/images/header.jpg)
Hi everyone! I thought I'd take a break from the usual SoHo Shorts sew-along to share a quick tutorial on how to add belt loops. Whether you're working on shorts or a skirt, it's a simple way to elevate your project. Let's dive in!
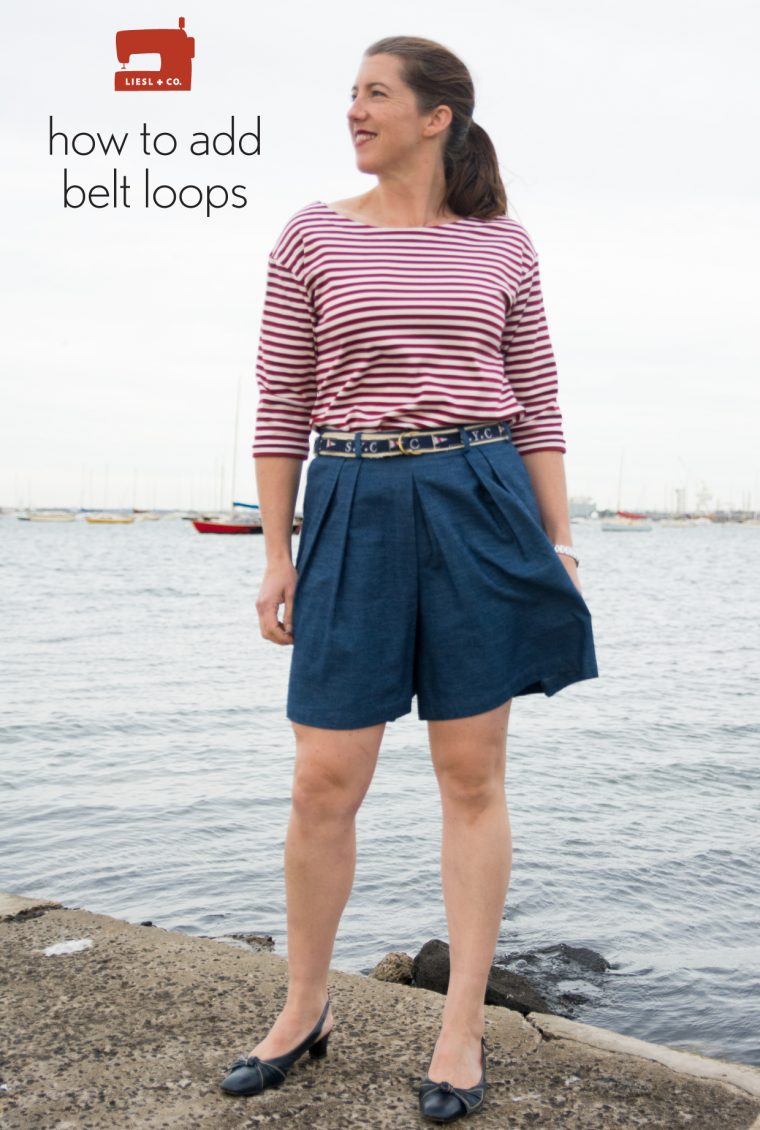
Hello, lovely sewists! How’s your SoHo Shorts journey going? If you're still early in the process, now’s a great time to think about whether you’d like to add belt loops to your shorts or skirt. It’s incredibly straightforward to do, and I’ll guide you step by step.
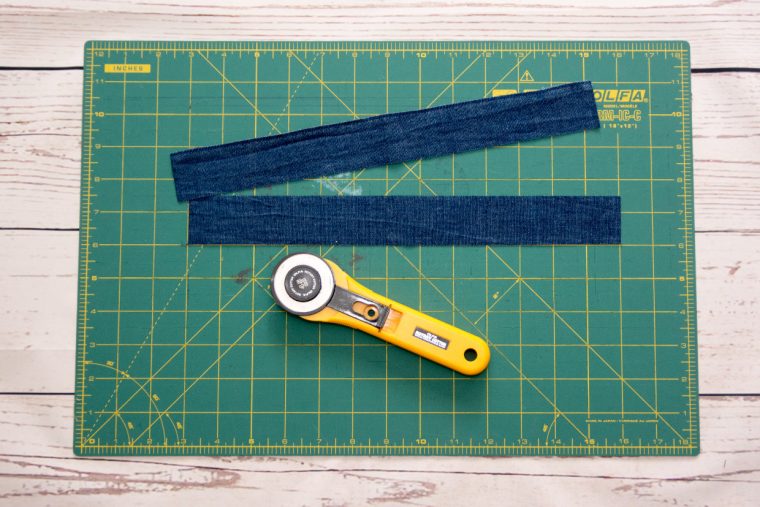
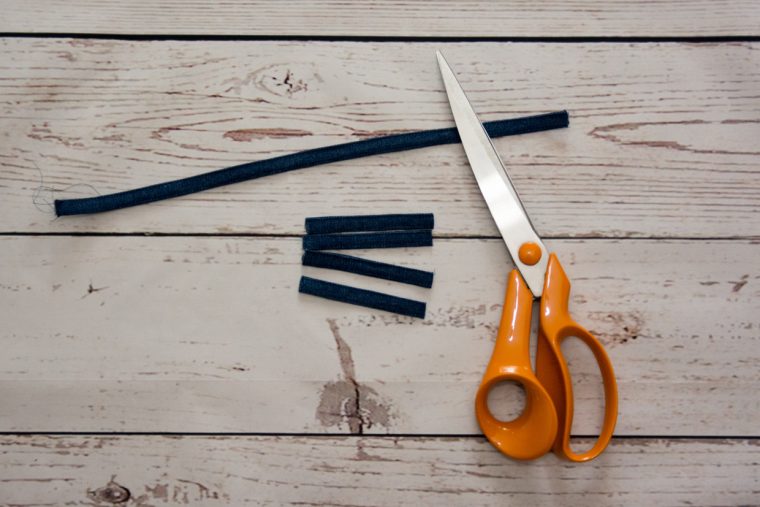
First, cut two strips of your main fabric, each measuring 1.5 inches by 13 inches. These will result in finished belt loops that are 3/8 inch wide. You’ll end up with enough material to create eight individual loops—four for the front and four for the back.
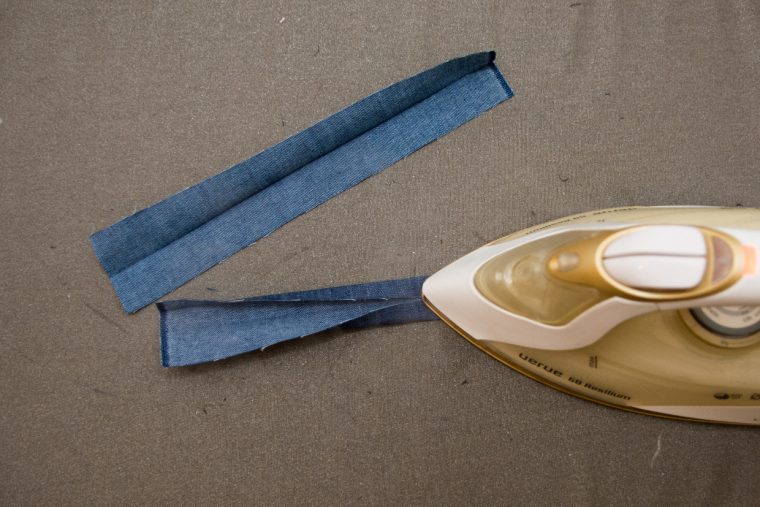
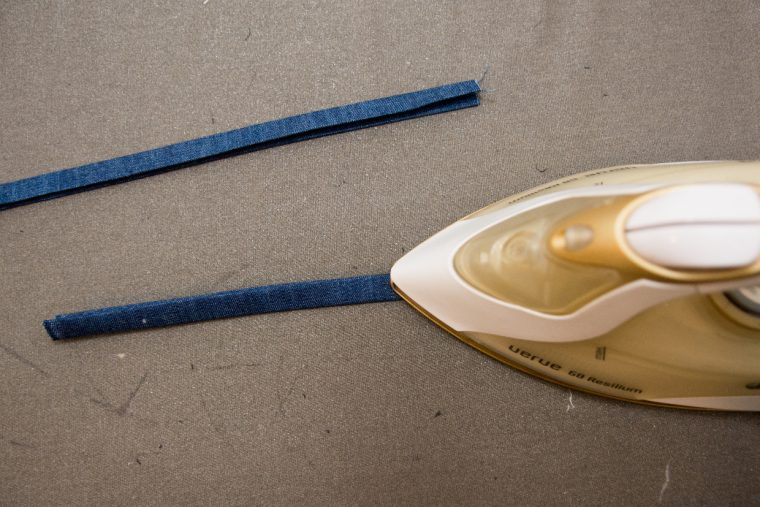
Next, press the strips in half lengthwise, wrong sides together. Unfold this crease, then press each long edge toward the center fold line. Once you’ve done that, re-fold the center crease and press the strips in half again lengthwise. This creates a tidy channel where the belt loops will sit comfortably.
Once your strips are pressed and ready, stitch along both long edges using a very small stitch length—about 1/8 inch from the edge. This will help hold everything in place while you cut the strips into four equal sections. Each section should measure approximately 3.25 inches long.
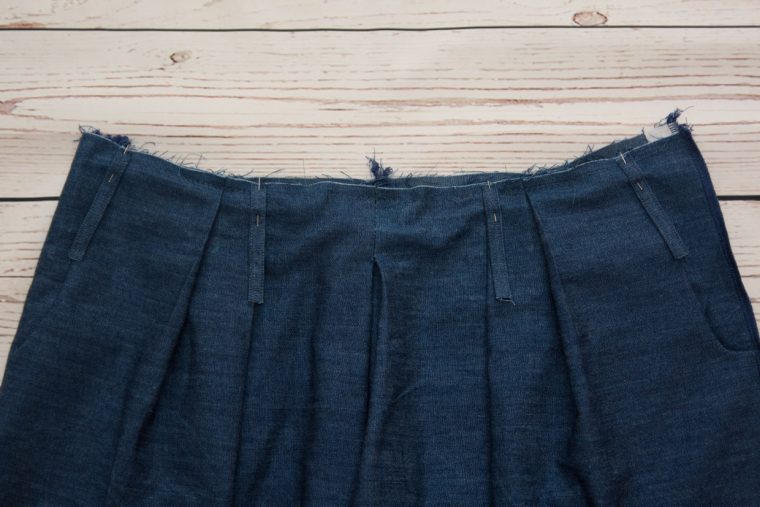
Now comes the fun part—attaching the belt loops to your shorts or skirt! Make sure you’ve constructed the garment up to the point where you’re about to attach the waistband (Step 6 in the instructions). Pin the belt loops to the top, raw edge of the shorts or skirt. For the front, I’ve placed mine over the centermost pleat lines and along each pocket edge. On the back, I’ve positioned them over the back pleat lines and spaced one on either side of the center back seam, about 1/4 inch away from the seam itself.
Keep in mind that if your belt loops are stitched with a contrasting thread or look tidier on one side, pin them with the right side facing down. The side that faces down during this step will eventually become the visible side of the belt loop.
After pinning, attach the waistband according to the instructions. When pressing the waistband and seam allowances upward, ensure the belt loops remain pointed downward. Next, stitch across each belt loop about 1/4 inch below the waistband seam to prevent them from flaring outward too much.
Finally, complete the waistband, insert the zipper, and hem the shorts as per the instructions. To finish the belt loops, press them upward, fold over about 1/4 inch at the top, and edgestitch the top of the belt loop to the waistband. Be mindful not to make the belt loops too tight or flat against the waistband—you want enough room for a belt to slide easily beneath them.

Trim any visible threads from underneath the belt loops, and if desired, edgestitch again about 1/8 inch below the first line of stitching. And there you have it—a stylish finishing touch for your SoHo Shorts or Skirt!
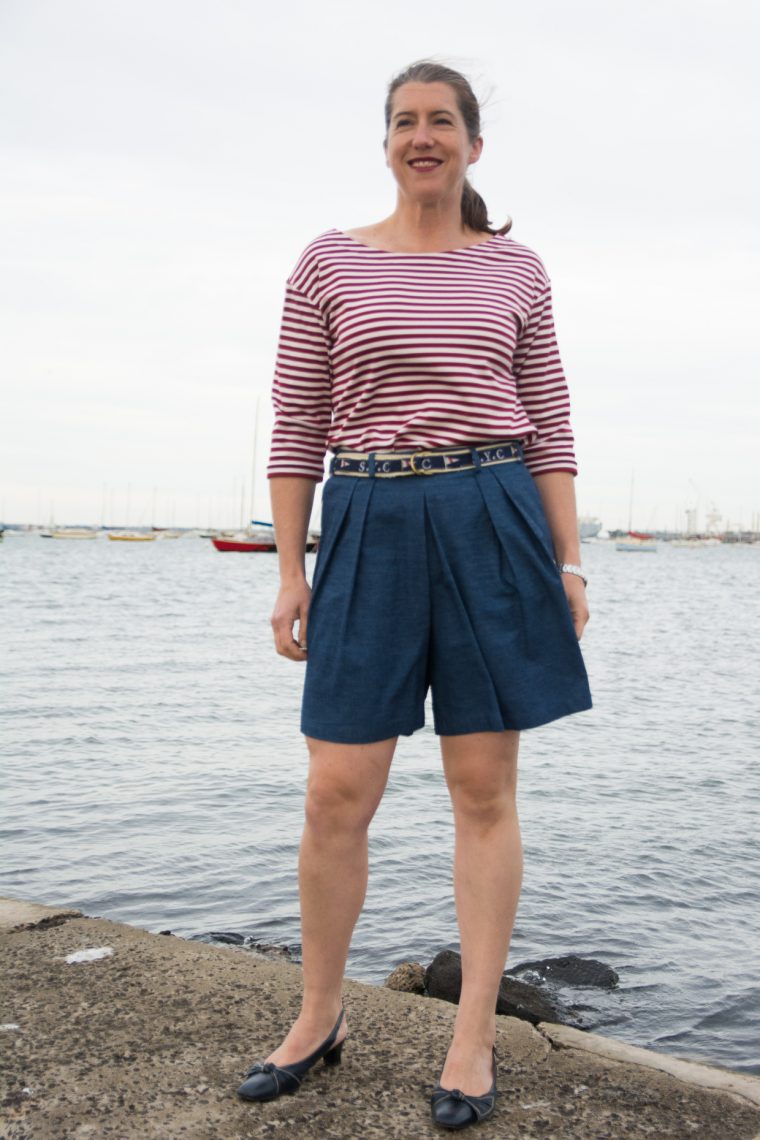
I absolutely loved sewing these shorts, and I couldn’t be happier with how they turned out. Adding the belt loops was such a satisfying detail, and I can’t wait to see what everyone else creates. Even though it’s not exactly shorts weather here in Australia, I’m already dreaming of making another pair in wool to wear over tights this winter. Fingers crossed you’re all enjoying some sunny days before the sew-along wraps up!
Happy sewing, everyone!
(adsbygoogle = window.adsbygoogle || []).push({}); Â
Custom Made Bras,Wireless Bra,Side Smoothing Bra,Push Up Bra,Functional Underwear
Foshan Nanhai Boxin Clothing Co., Ltd , https://www.boxinfushi.com